

Introducing Monthly Edits
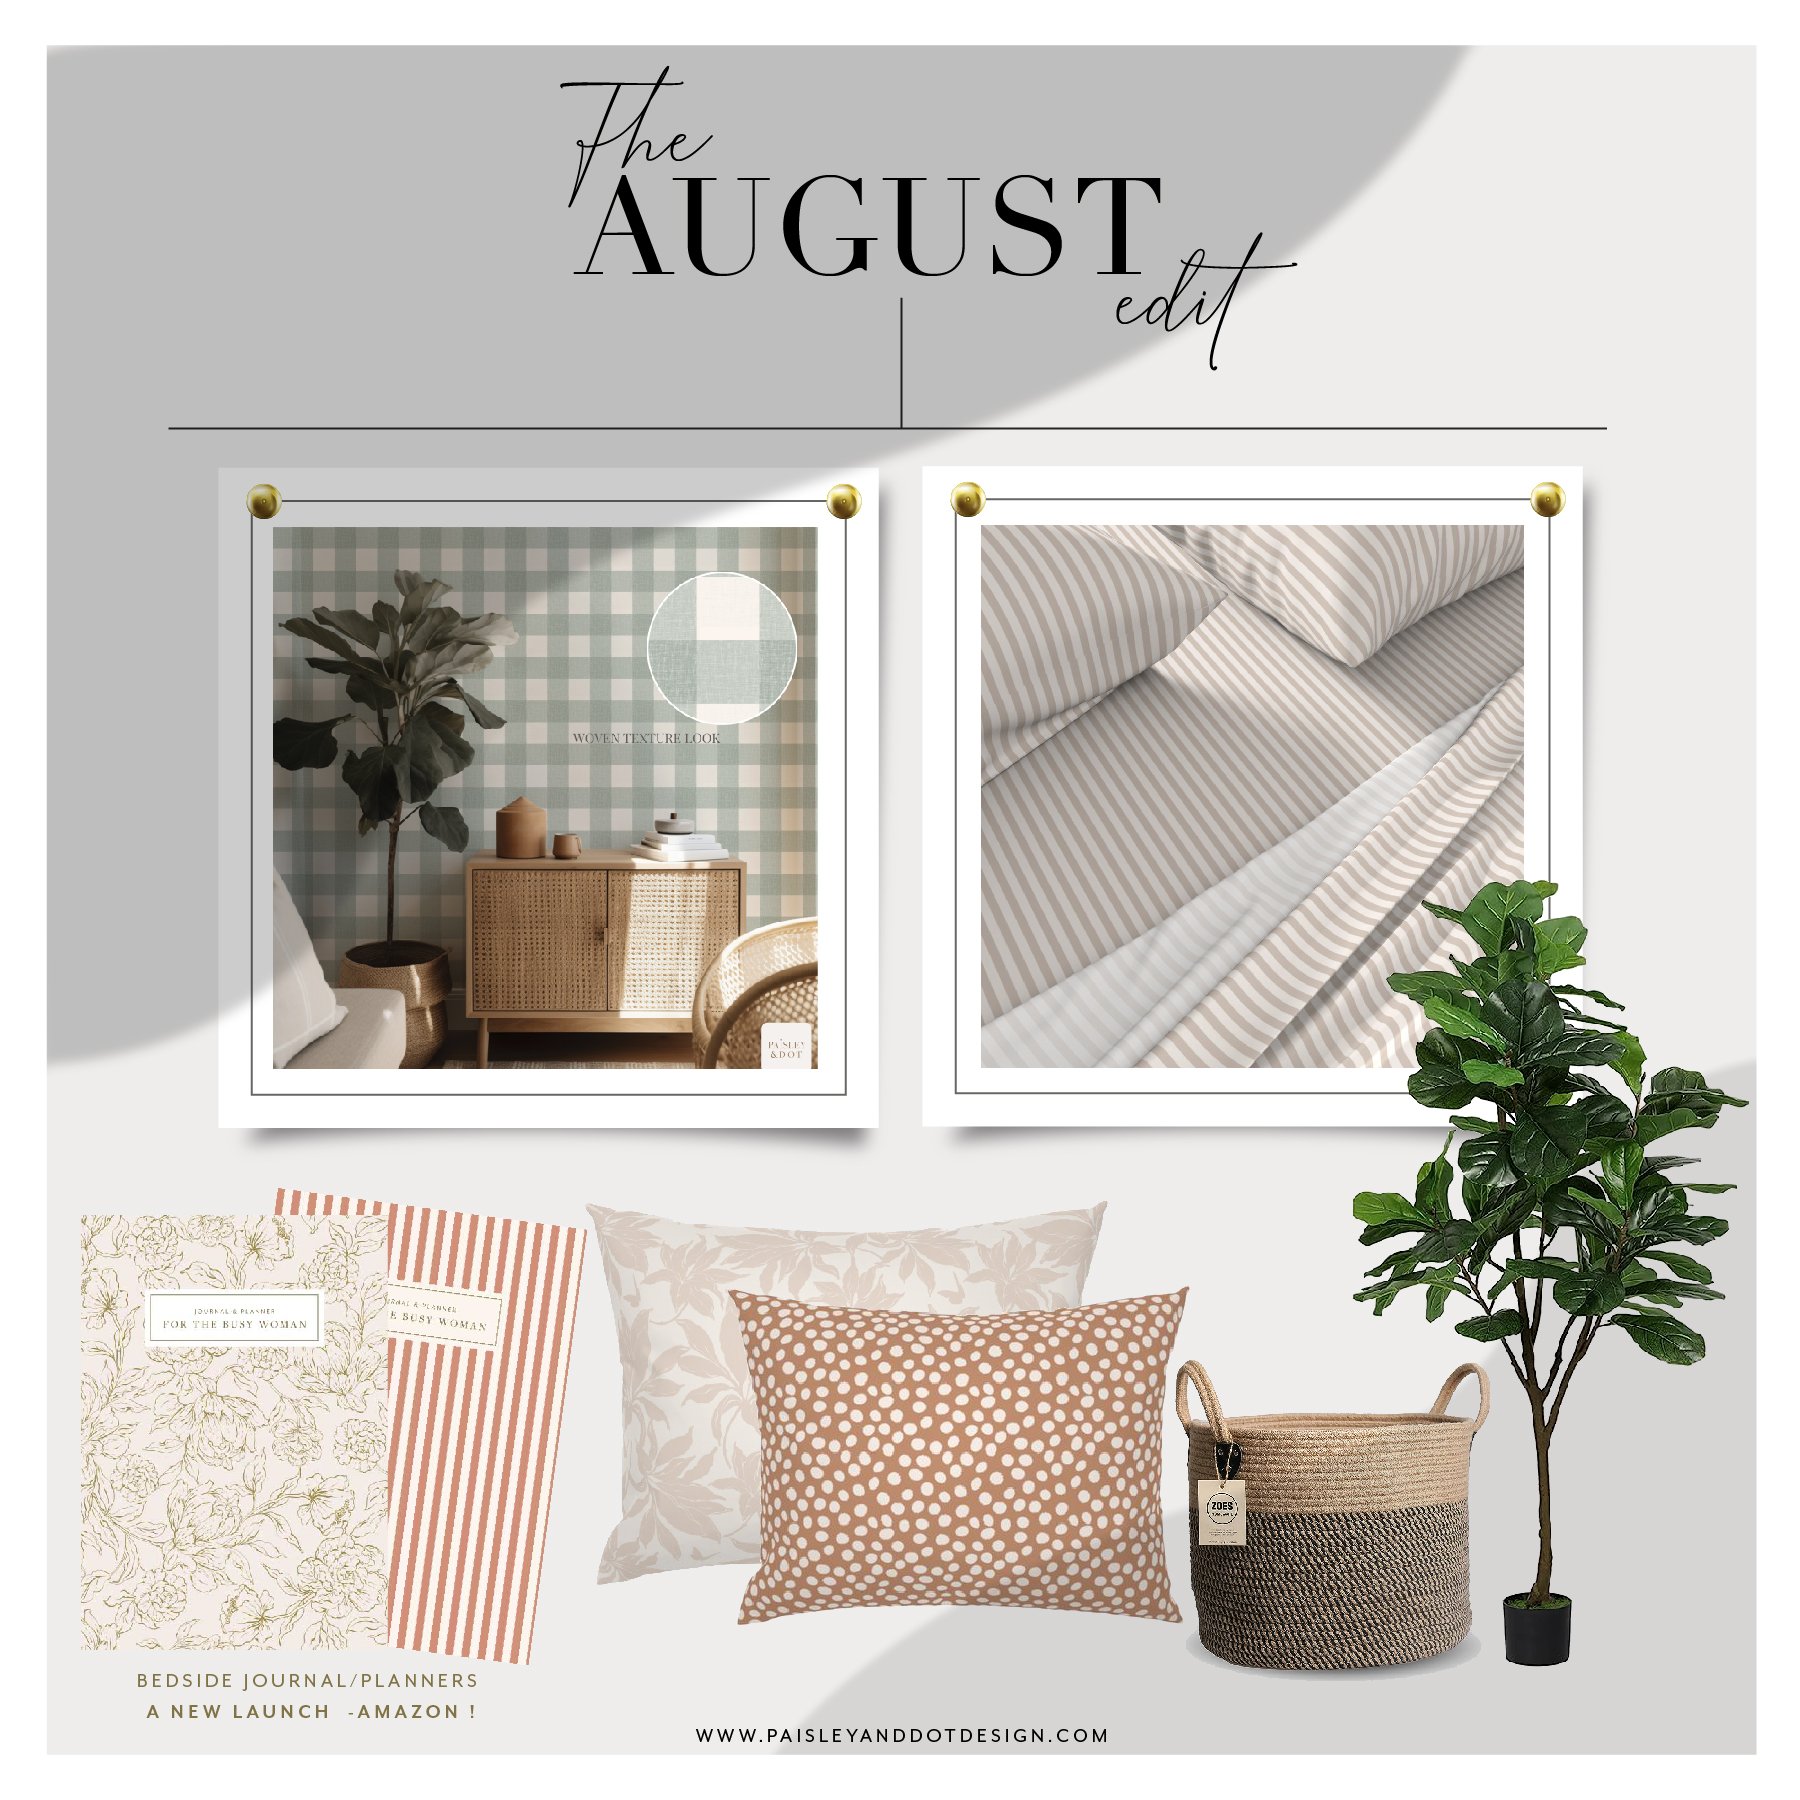
Here is our quick guide to the things i’m loving this season. It’s a curation of items from Etsy, Spoonflower and Amazon.com that reflect our vibe for the month.
Yes, i’m biased because most are from our studio, ahem…but anyway. I personally feel that this collection is so season-less but also at the same time feels like the perfect transitional color from end of summer into autumn (at least here in the U.S.A)
I’m MOSTLY excited to announce the launch of our journal planners.
Want to hear more about them? ok, get comfy. Here goes.
I designed the planners thinking about what I would personally want in one. It’s honestly and all inclusive, non-overwhelming planner.
An (undated) All-in-One Journal/Planner which I’m excited about because it includes EVERYTHING ! (see below)
Also, all cover artwork is my own. It’s priced at $20. It’s a smooth paperback item , that is also lightweight and easily fits into most standard bag sizes. A perfect stocking stuffer .
I know what you’re thinking, OH NO, don’t start with the Christmas talk in August…but I had to. So go ahead and add it too your Amazon wish list if you’re gifting it during that time of year.
What’s inside this cool book.
1.A fun About Me page
2.Weekly planning pages
3.To-Do list pages
4.Budgeting pages
5.Grocery lists pages
6.Meal planning
7.Body Measurement tracker
8.Weight Tracker
9.Menstrual Cycle tracker
10.Password Tracker
11.Angel Number Guide
12.Morning Routine
13.Beauty Sleep Routine
14.Great quotes to help with Mindset
15Lined Pages
16.Grid Pages
17.Blank pages, in case you want to draw
Enough about the notebooks, NOW let's get to the products on this image and their links…you’re welcome (Wink)
PEEL & STICK REMOVABLE WALLPAPER ( available in three pattern sizes)
STRIPED All-IN-ONE JOURNAL /PLANNER
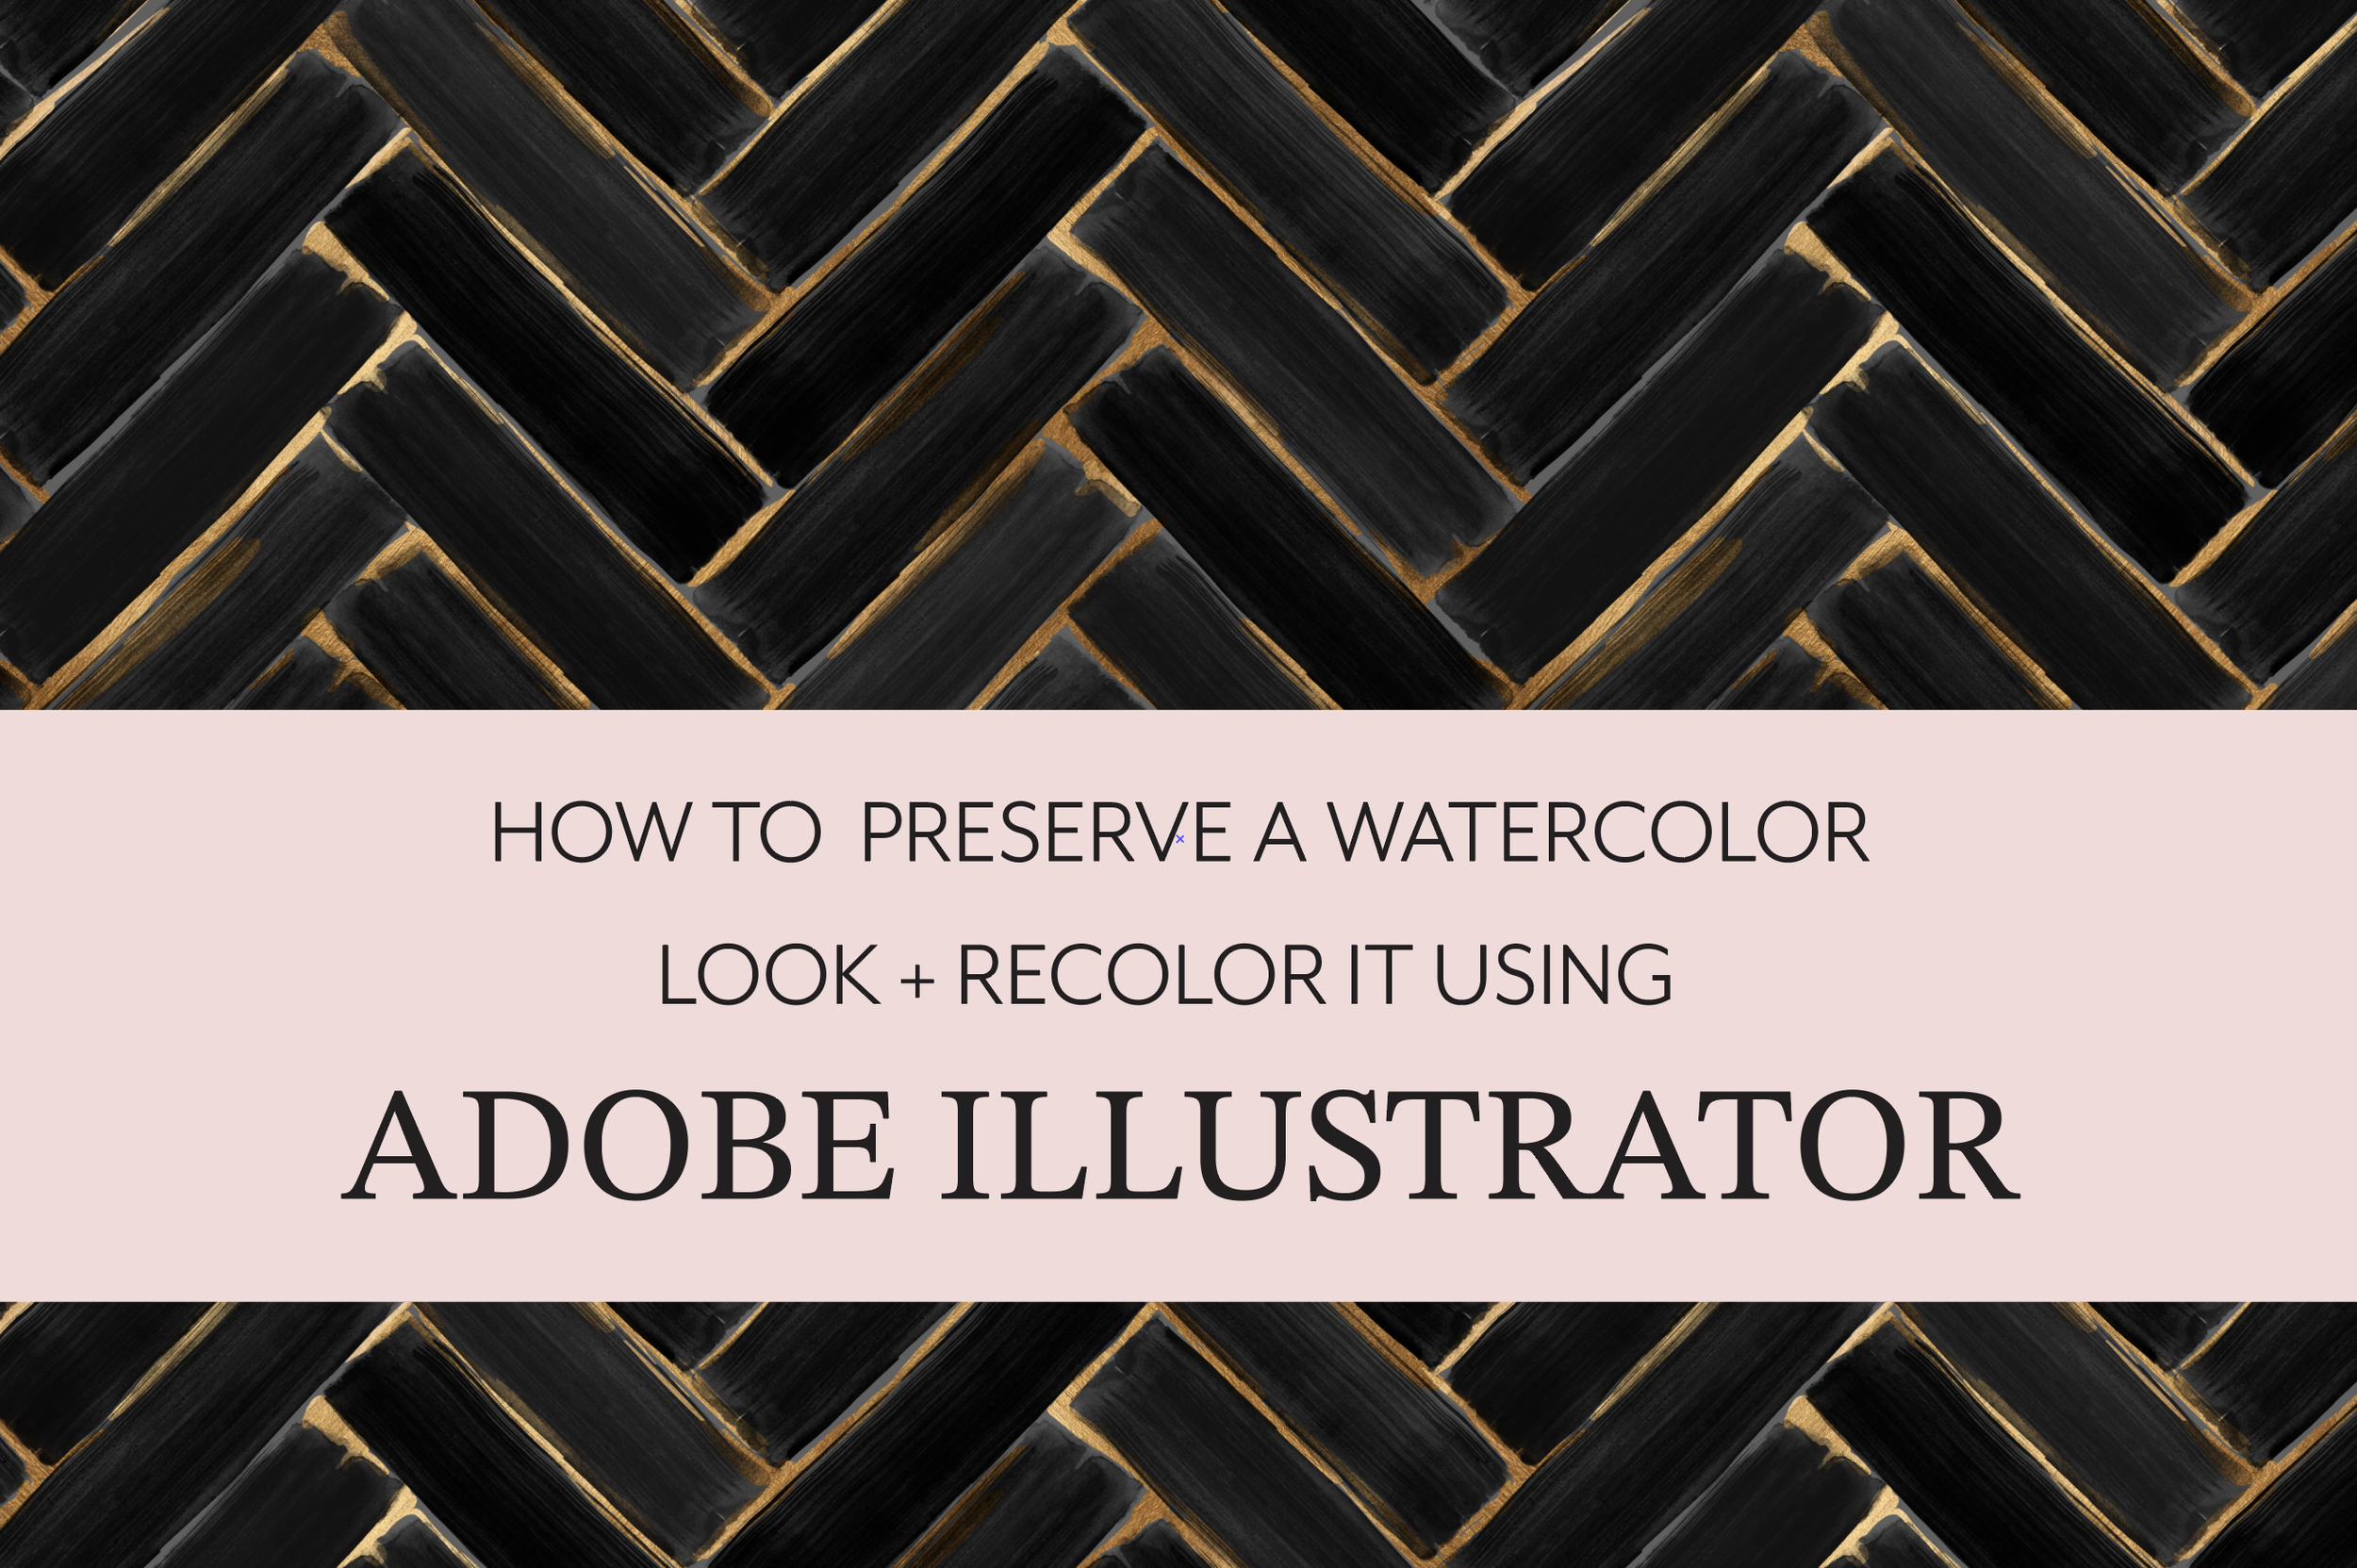
Preserving and recoloring a true watercolor look in Adobe Illustrator
How to preserve a watercolor look and Recolor it using Adobe Illustrator
PIN PIN PIN !!!! Create an Adobe Folder in your Pinterest and Add this to your Pinterest board !
If you are an Artist (especially a beginner) who uses Photoshop or Illustrator, one quickly learns that Photoshop is a Raster-based program while Adobe Illustrator is a Vector-based program . I won’t get into the nitty gritty and dissect all of the technicalities, that can be another future post, but in essence what this difference boils down to is that Photoshop is pixel based therefore great for watercolors and almost any other texture, while vector is focused on clean line that do not pixelate when enlarging the scale .
Artists tend to lean towards one more than the other depending on their style of rendering art. I personally love to illustrate and add lots of linear details to my work so I love Adobe Illustrator. I do use Photoshop in some initial prep work when I do want to include some watercolor, oil pastels, chalk, or any other very organic traditional art texture into my work.
Some might wonder how it could be possible to preserve a watercolor look in an Adobe Illustrator file, let alone also be able to recolor it. I’m here to show you how I personally go about.
PHASE 1 - Scanning & Cleaning
IMPORTANT NOTE! Your watercolor must be one color. If you want to layer or overlap multiple brush strokes in different colors, then each brush stroke should be isolated.
PHASE 1 : Preparing your brush stroke in Photoshop .
1) Paint your brush stroke in BLACK PAINT. If you don’t have black paint, it’s fine, You can always change it to black in photoshop using the “Adjustment settings” . Comment below if you would like a future video on this particular step. Want to know a secret. My original brush stroke was a baby blue
2) Scan your Paint brush at a good resolution ( 300 Dpi is great!) .If your Smart Phone has a great camera, You can always just take a picture or Scan it using the Adobe Scan App !
3) Now that you opened the paint brush stroke in Photoshop and it’s in BLACK color on WHITE background, go ahead and find the MAGIC eraser took in the tool box. You can also use the magic want and select all of the white background to delete. Feel free to use a combination of the two if you need to. The end result is to eliminate all of the white background. If your brush stroke edges are too rough, you can change the brush type in your Eraser tool to a smooth airbrush, or use the smudge or blend tool to smooth out the edges a bit.
4) Open Adobe Illustrator. Now take your cleaned brush stroke from photoshop, select it ,copy it, then paste it in your Illustrator file. It should already have the transparent background. If you want to save the brush with a transparent background, go to your photoshop file and save it as a .PNG file with transparent background. Check your file saving settings as you do this. Make sure the background is set to Transparent in your setting.
If you don’t want to go through the drop down menus to copy and paste from Photoshop into Illustrator, you can just click and drag the brush from photoshop right into Illustrator.
Phase 2 - Recoloring watercolor in Illustrator
PHASE 2 - Recoloring your Watercolor in Adobe Illustrator
*You can go ahead and close Photoshop because the next steps will be all using Illustrator.
1.Create a shape over your brush making sure that it’s completely covered
2. Select both, the brush and the colored shape overlay
3. Go to Transparency and click on the Make Mask button
4. Check the box for Invert Mark.
5. BOOM ! it’s done. You’ve recolored your watercolor in .Ai . It’s pretty cool, right?!
Phase 3 ( Bonus) - Adding photo-real paint strokes
PHASE 3 - Adding the Metallic Photoreal Look !
This one is pretty simple.
1) Go to a Royalty Free photography website where you are allowed to use the images for FREE for your projects . I had this brushed gold metallic JPG for years . It is not a seamless file.
2) drag that metallic jpg into your SWATCHES palette. It doesnt have to be a brushed metallic like mine, Try any other texture if you wish glitter is a fun idea !
3) I love using the Blob Brush tool , to “paint” in my gold touches in between , over and underneath the black Watercolor brush stoke.
Using these learning you can create BEAUTIFUL artworks or arrange your motifs in a way to create seamless repeating patterns if you wish !
